Inside Crytek's Workflow: Building the World of Hunt: Showdown 1896
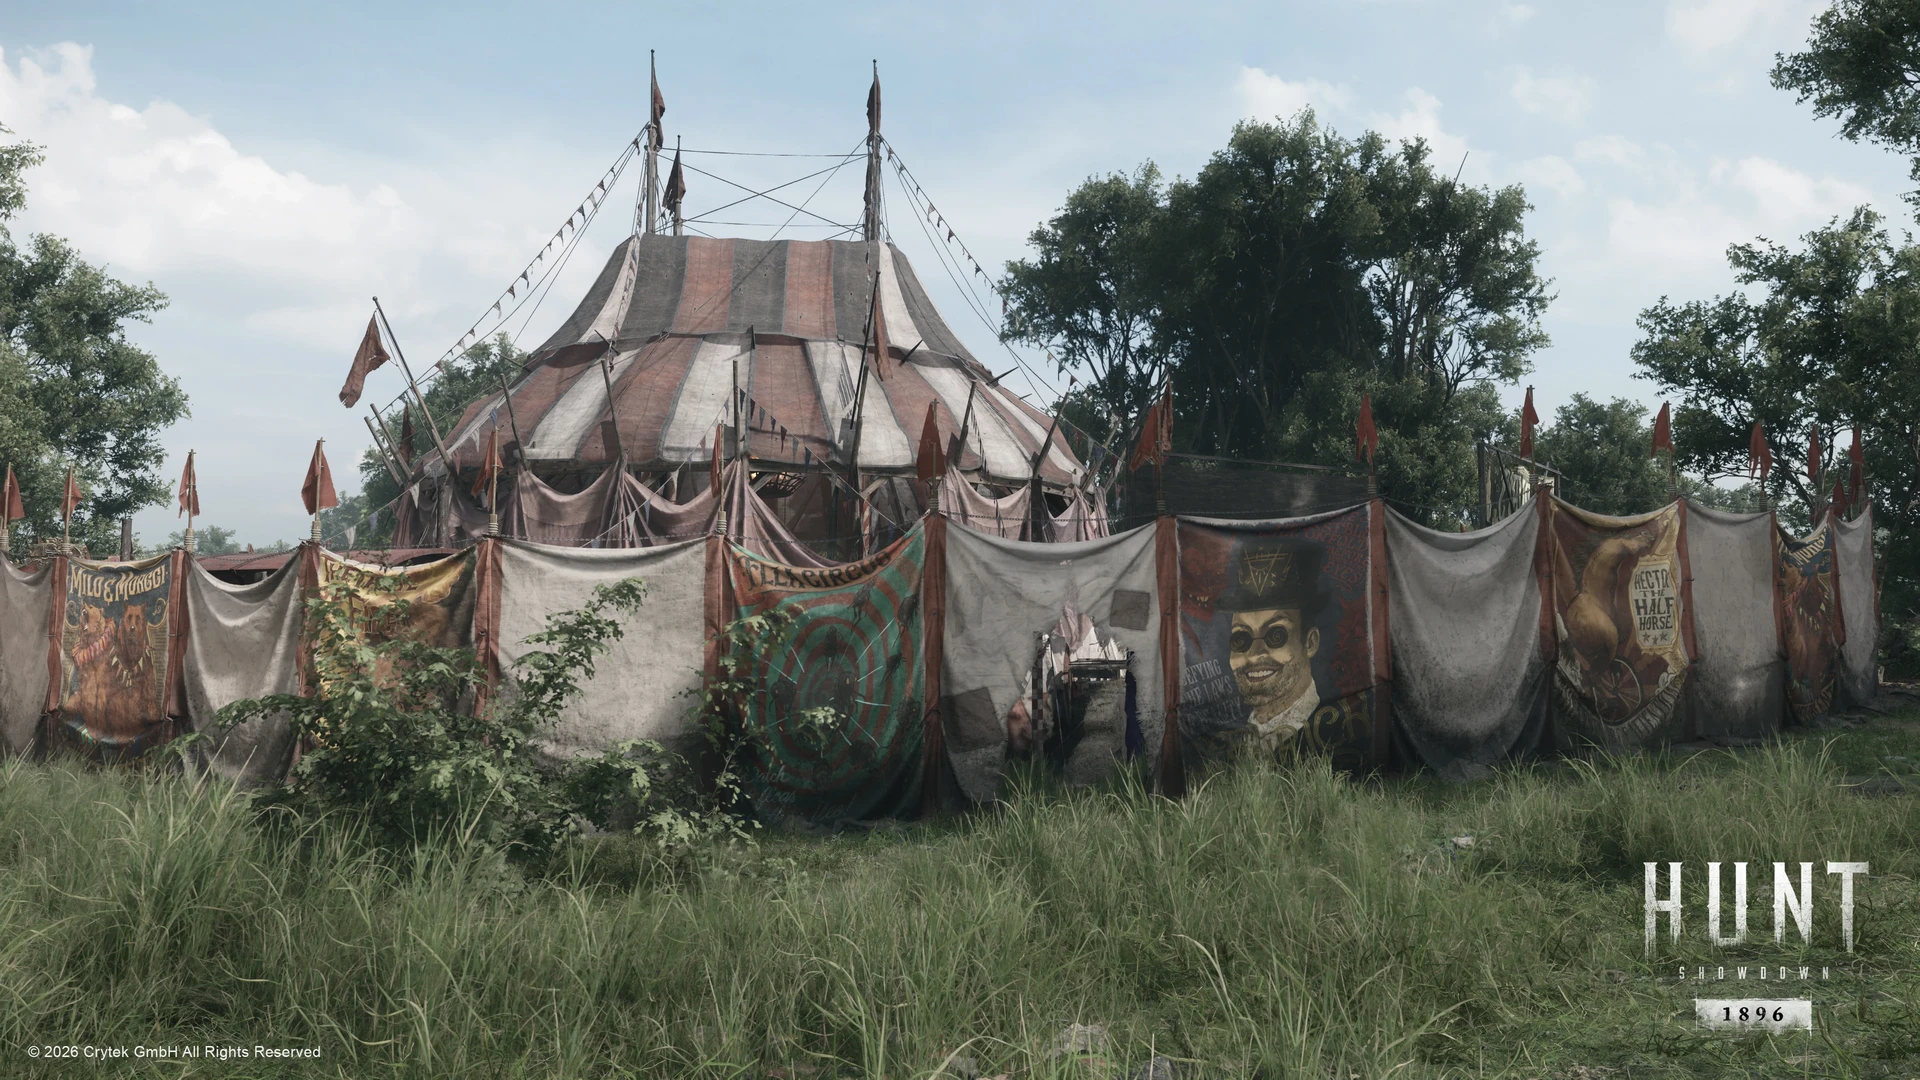
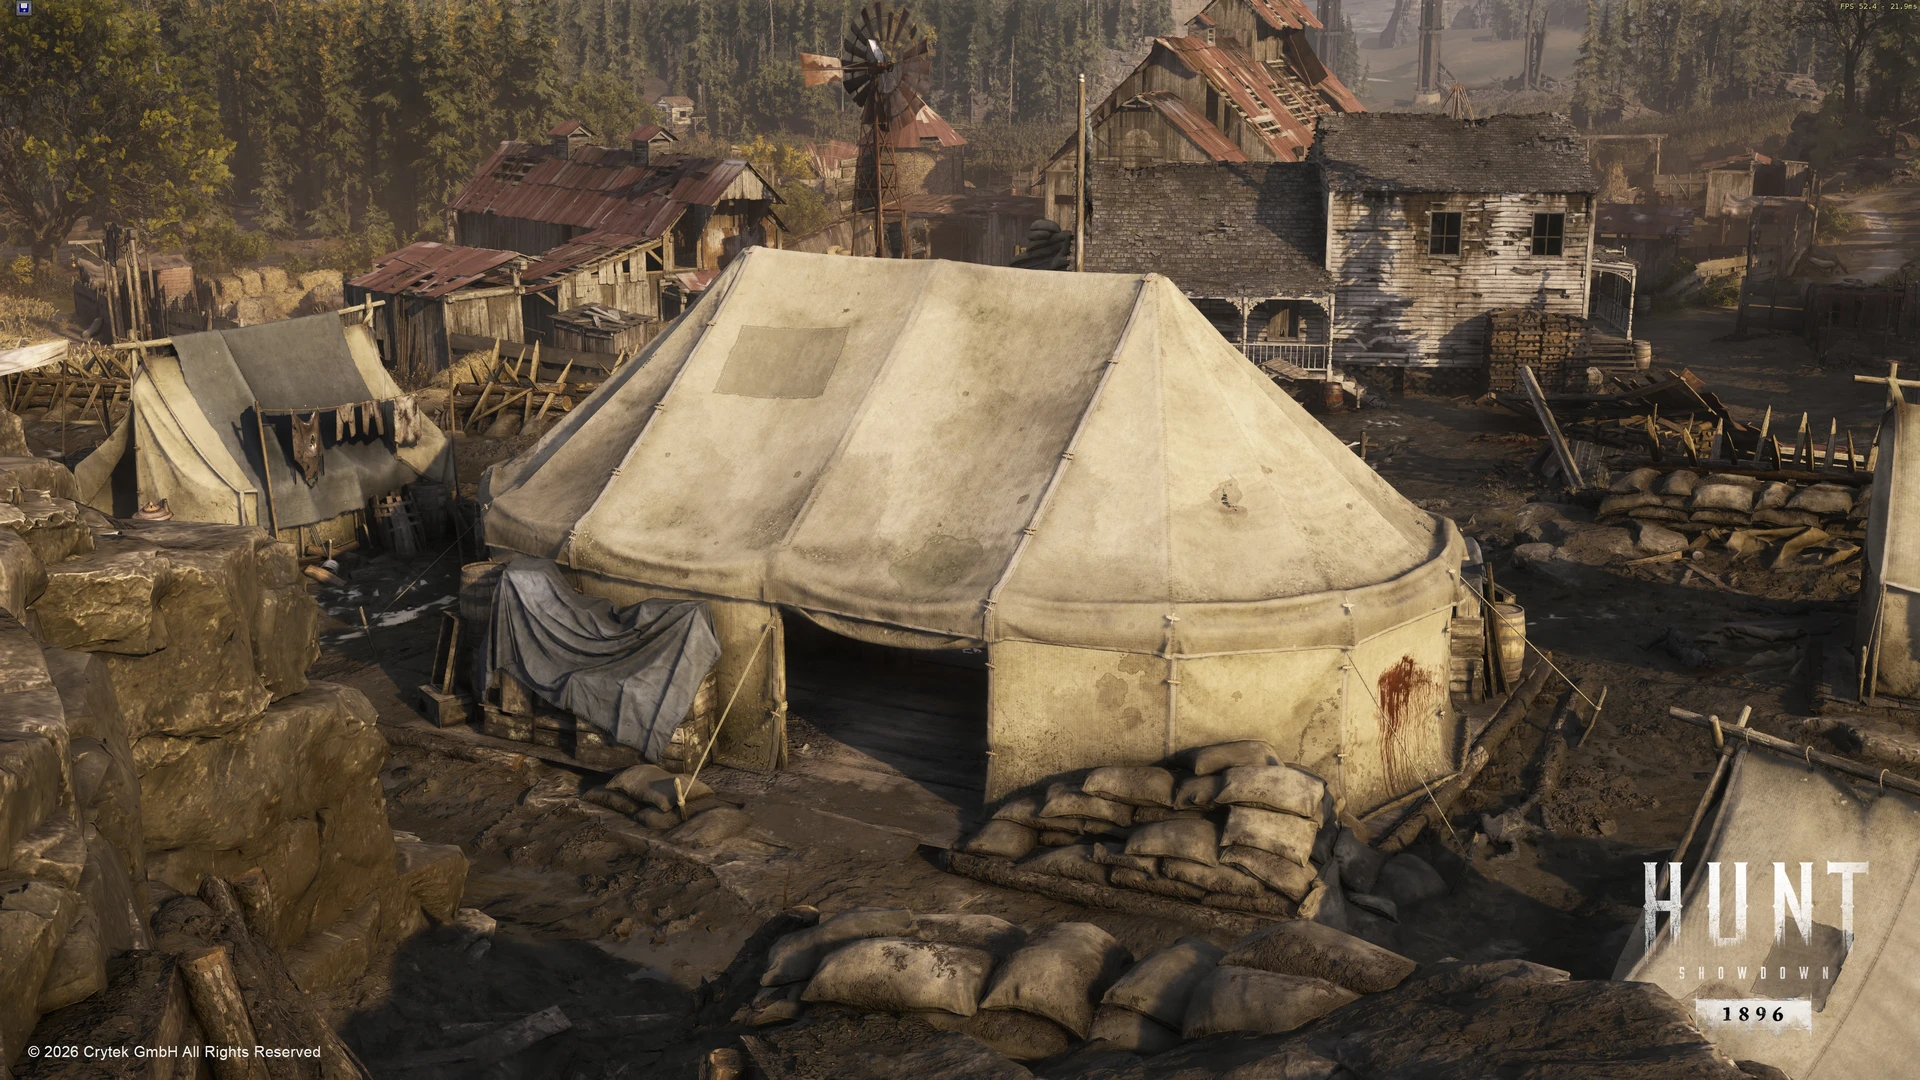
In this exclusive interview, Sven Ulrich, Senior Hard Surface Artist at Crytek, shares how his team leverages Marvelous Designer to build immersive, believable environments for the dark world of Hunt: Showdown 1896. Whether constructing modular fabric fences or rugged command tents, Sven breaks down his production process and shares essential tips on art-directing digital cloth.
Could you please introduce yourself and share a bit about your role in the development of Hunt: Showdown 1896?
I’m Sven Ulrich, Senior Hard Surface Artist at Crytek. Whilst I’m in the Hard Surface team, we’re split up further into two teams; weapons and props. I’m part of the props team.
I act as a connection point between various departments, such as game design & environment art, making sure the needs of both are met.
As a prop artist, I’m a bit of a jack of all trades, so I’ll have to adapt when more organic requests come in, i.e. in the form of cloth-related tasks, or other more organic (literally) tasks.
My usual focus is on creating either event-related props, reworking older props which aren’t up to par with the quality level we’d like, or simply creating the assets which are required for new gameplay ideas.
Sometimes this is through own initiative, other times it’s through Game Design or Environment Art requests.
The day-to-day work is phenomenal as each day, and each asset brings its own, new challenges which must be solved. This is especially true when you’re given more complex tasks and need to end up with a shippable asset. It’s like a big, complex puzzle which you figure out step by step.
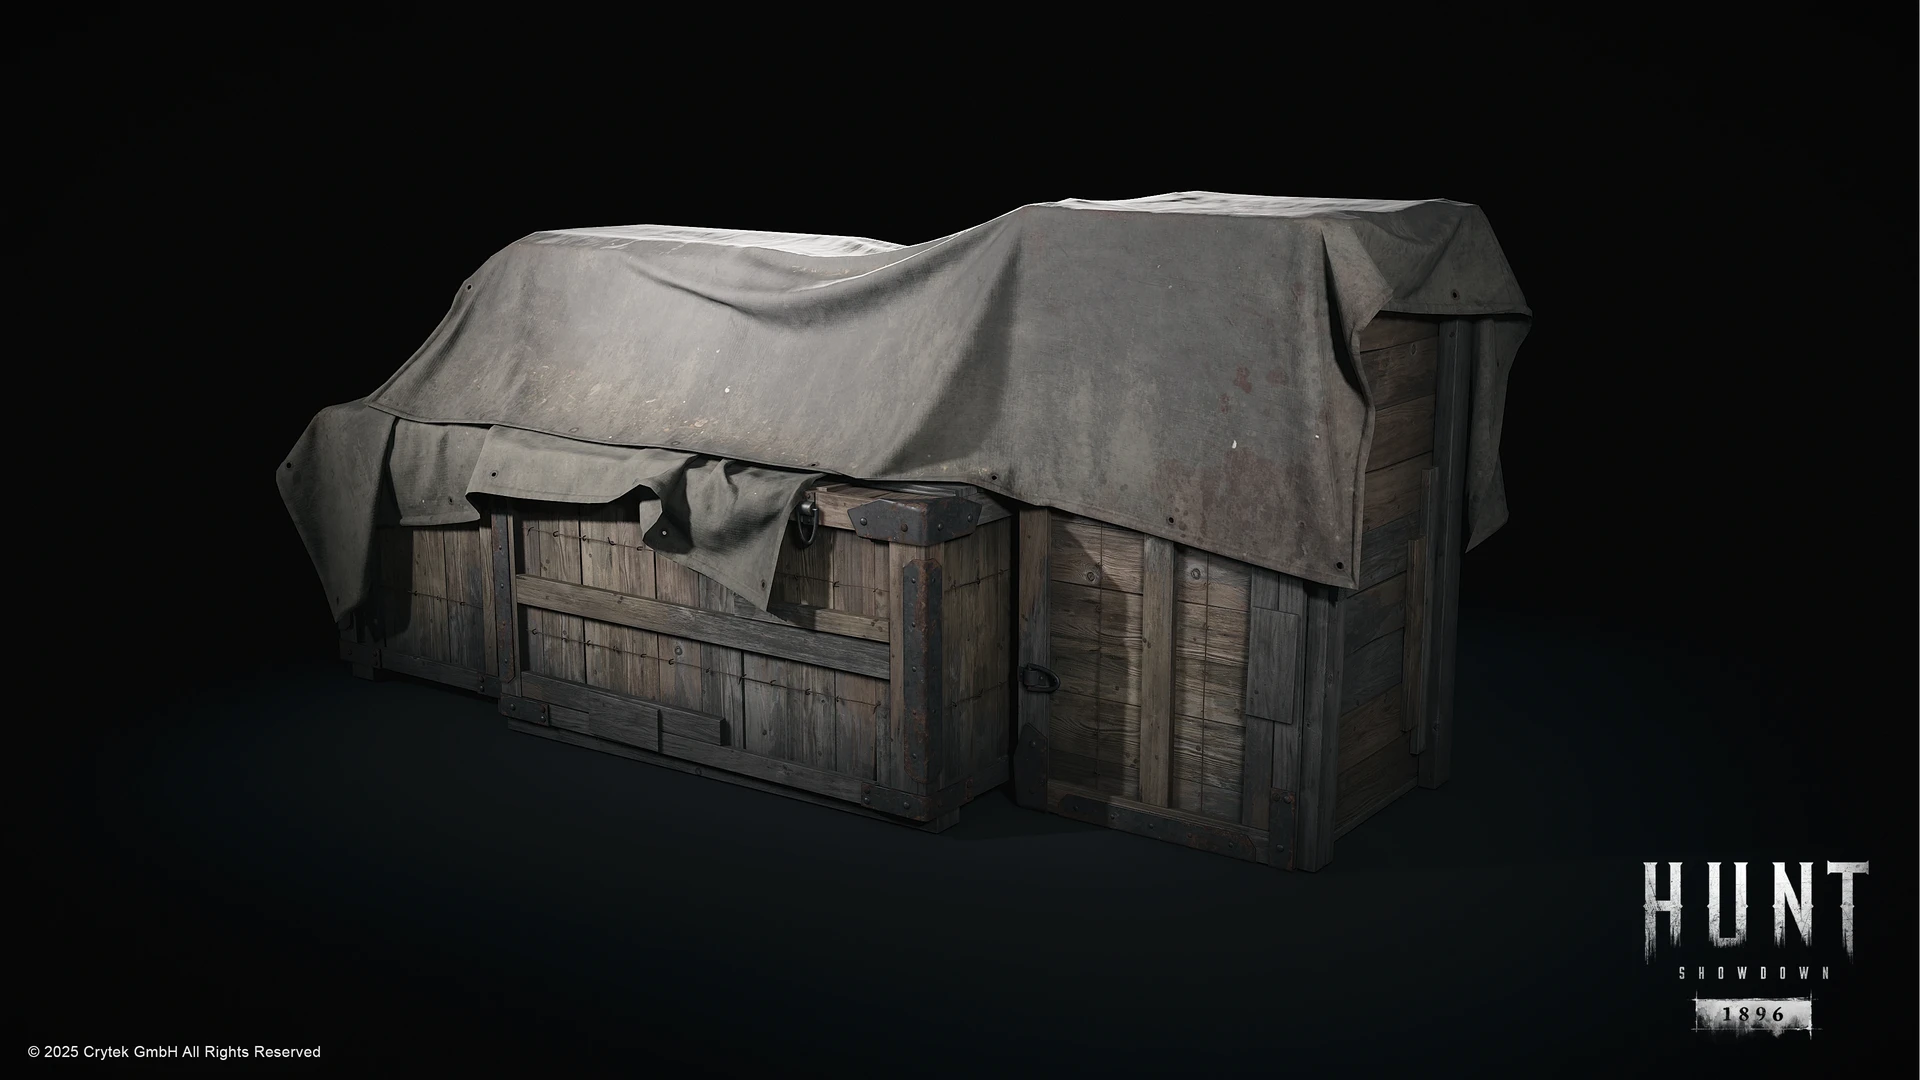
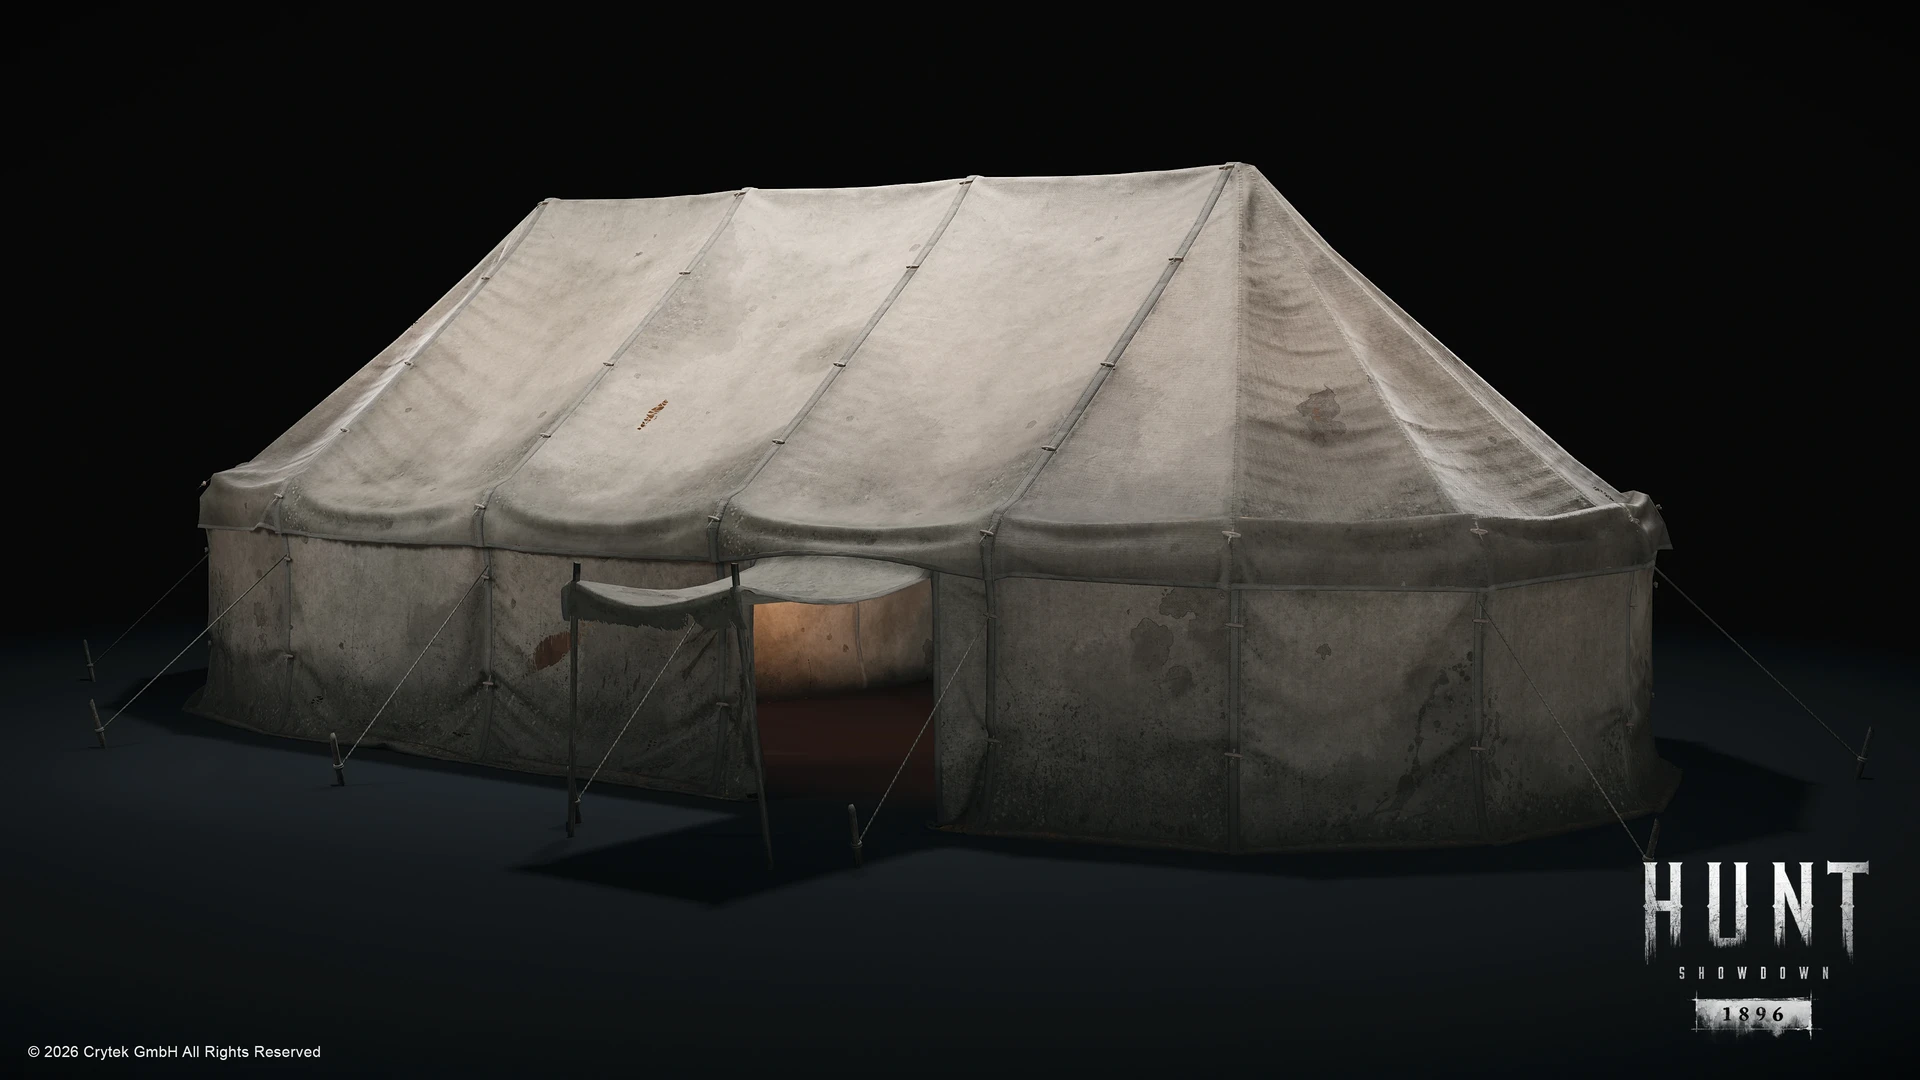
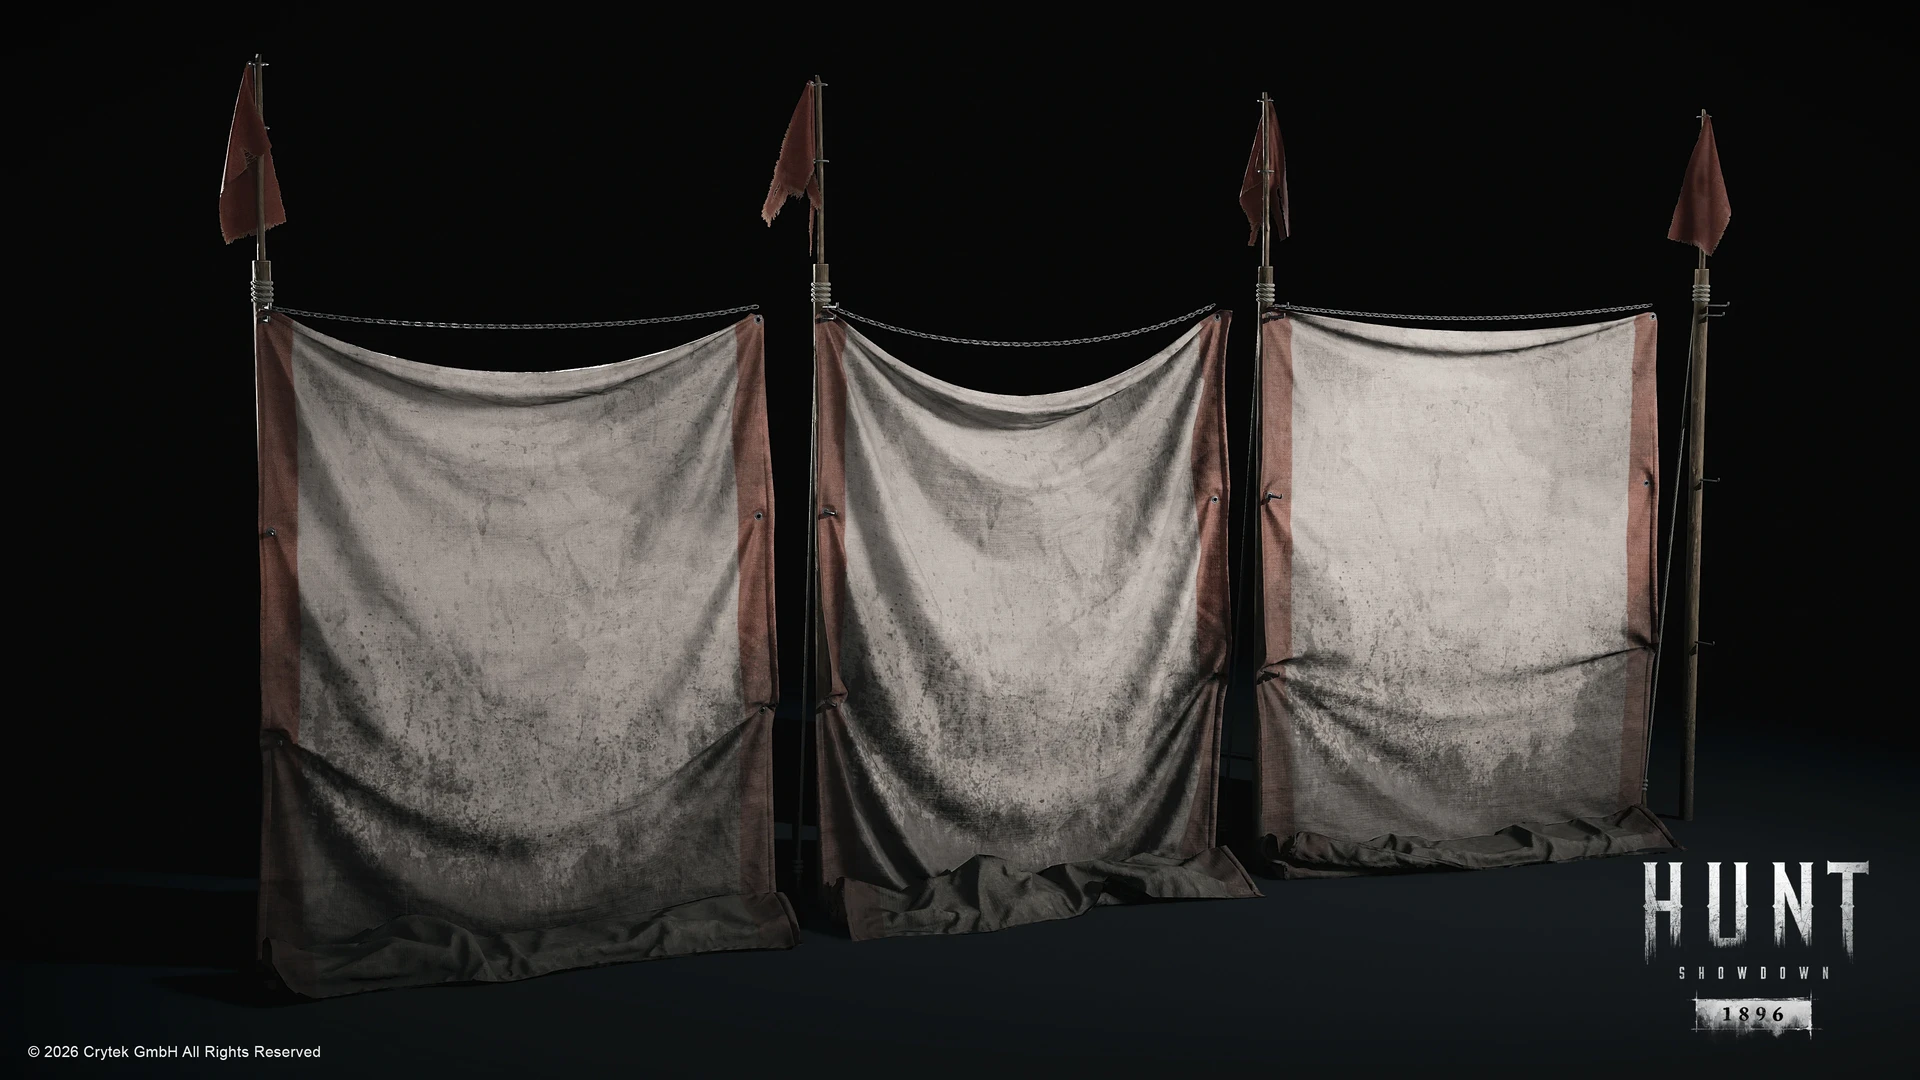
“Examples of assets in Hunt: Showdown 1896 which made extensive use of Marvelous Designer”
You created various environment assets like fabric fences and tents, how did Marvelous Designer add value to the project's world-building?
In Hunt: Showdown 1896 we like adding cloth here and there since it acts as a visual way of adding resting spots for your eyes. Lots of high frequency detail means the eye will be fatigued easily. Especially in a game where attention to detail matters during gameplay, having rest areas for your eyes is crucial. At the end of the day, it still has to look believable though, which is why we opted for Marvelous Designer.
Whilst tools such as Blender also have cloth simulation, and they’re not bad, getting the accuracy and realistic folds dependent on the fabric properties is incredibly valuable to our work.
However, the most essential difference between Marvelous Designer and the likes of Blender cloth simulation is that I can continually tweak the cloth, I’m not bound to simulation frames. The plethora of tools/features I have at my disposal to art direct the cloth in the way I need it to look simply outshines other DCC cloth simulation workflows in my opinion.
Therefore, what I like most about Marvelous Designer in our pipeline is that it gives extremely quick results which can be iterated and art directed very early on, so we don’t have to spend a lot of time tweaking numbers, adjusting sliders, etc. – it’s a very artist friendly approach to making cloth.
"Make something exist first, it can be made good after"
[Modular Tip] For the fabric fences, you used a single asset modularly to complete entire scenes. Do you have any tips for designing modular assets in Marvelous Designer?
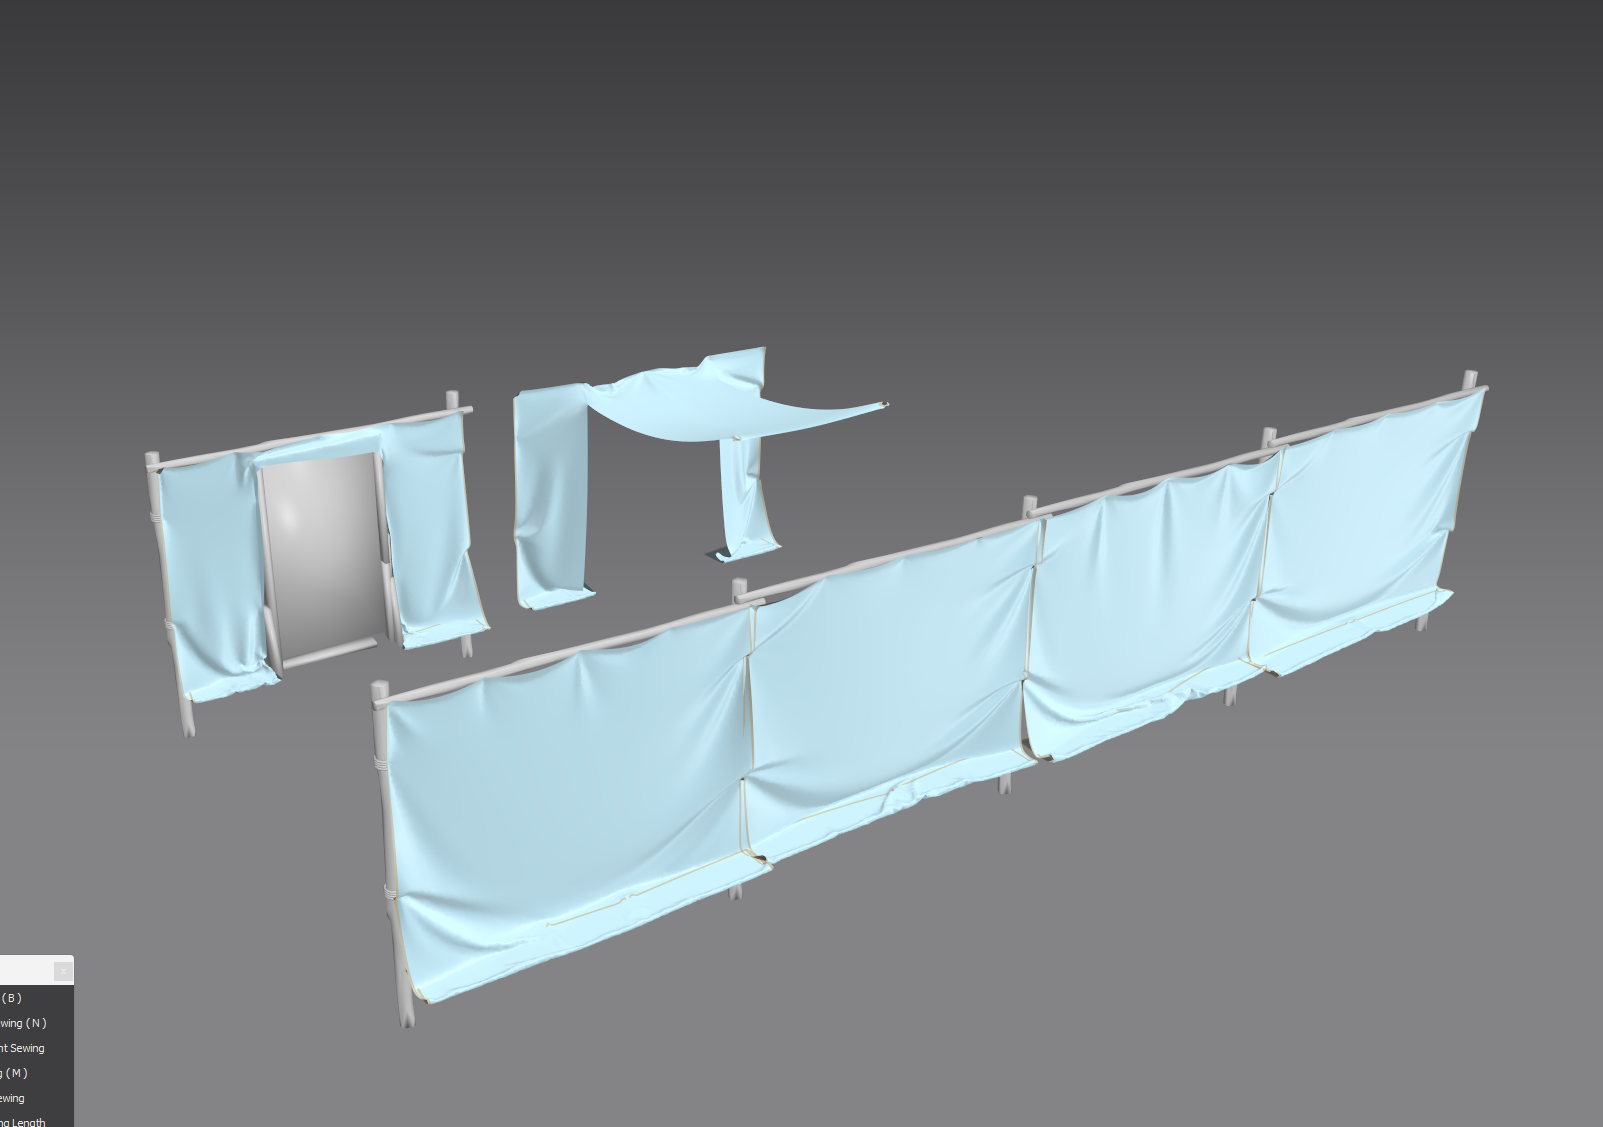
Freezing is my favourite feature in Marvelous Designer for creating modular assets. In essence modular assets need to fit together perfectly when placed next to each other, therefore where they overlap, they need to have the exact same geometry. Any z-fighting issues were fixed in blender.
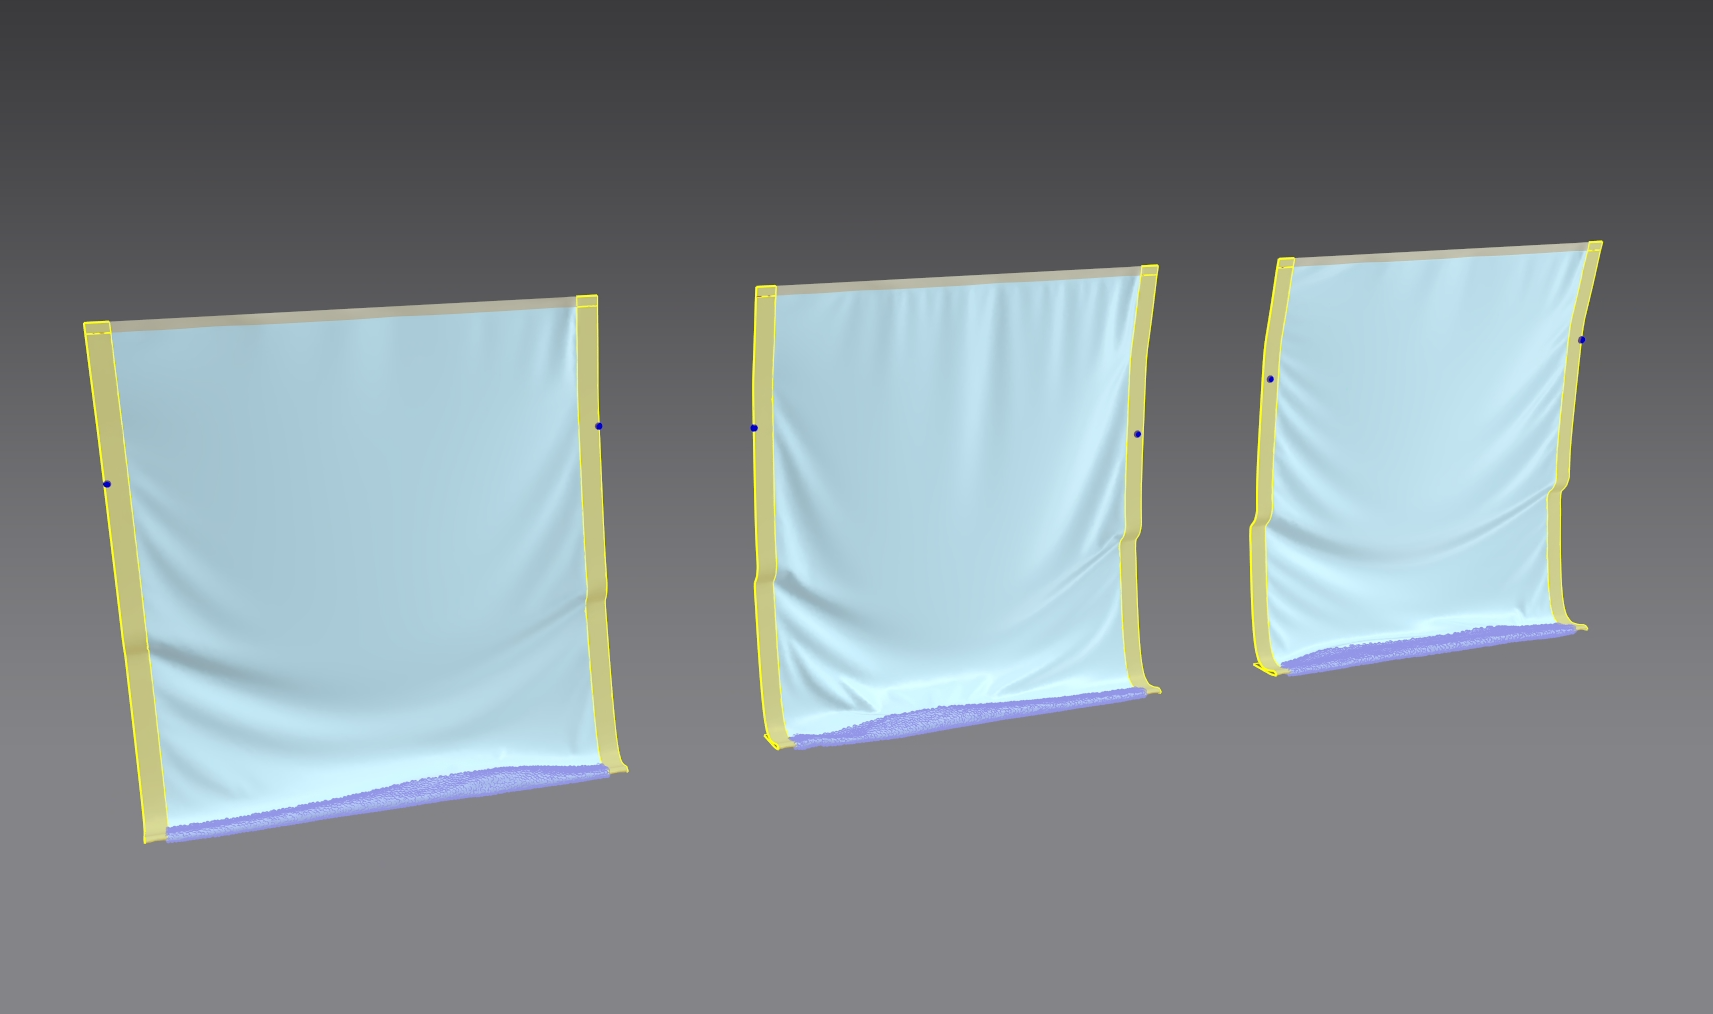
“Starts and end of cloth need to be the same mesh, else there are gaps at grazing angles, which directly affects the player experience.”
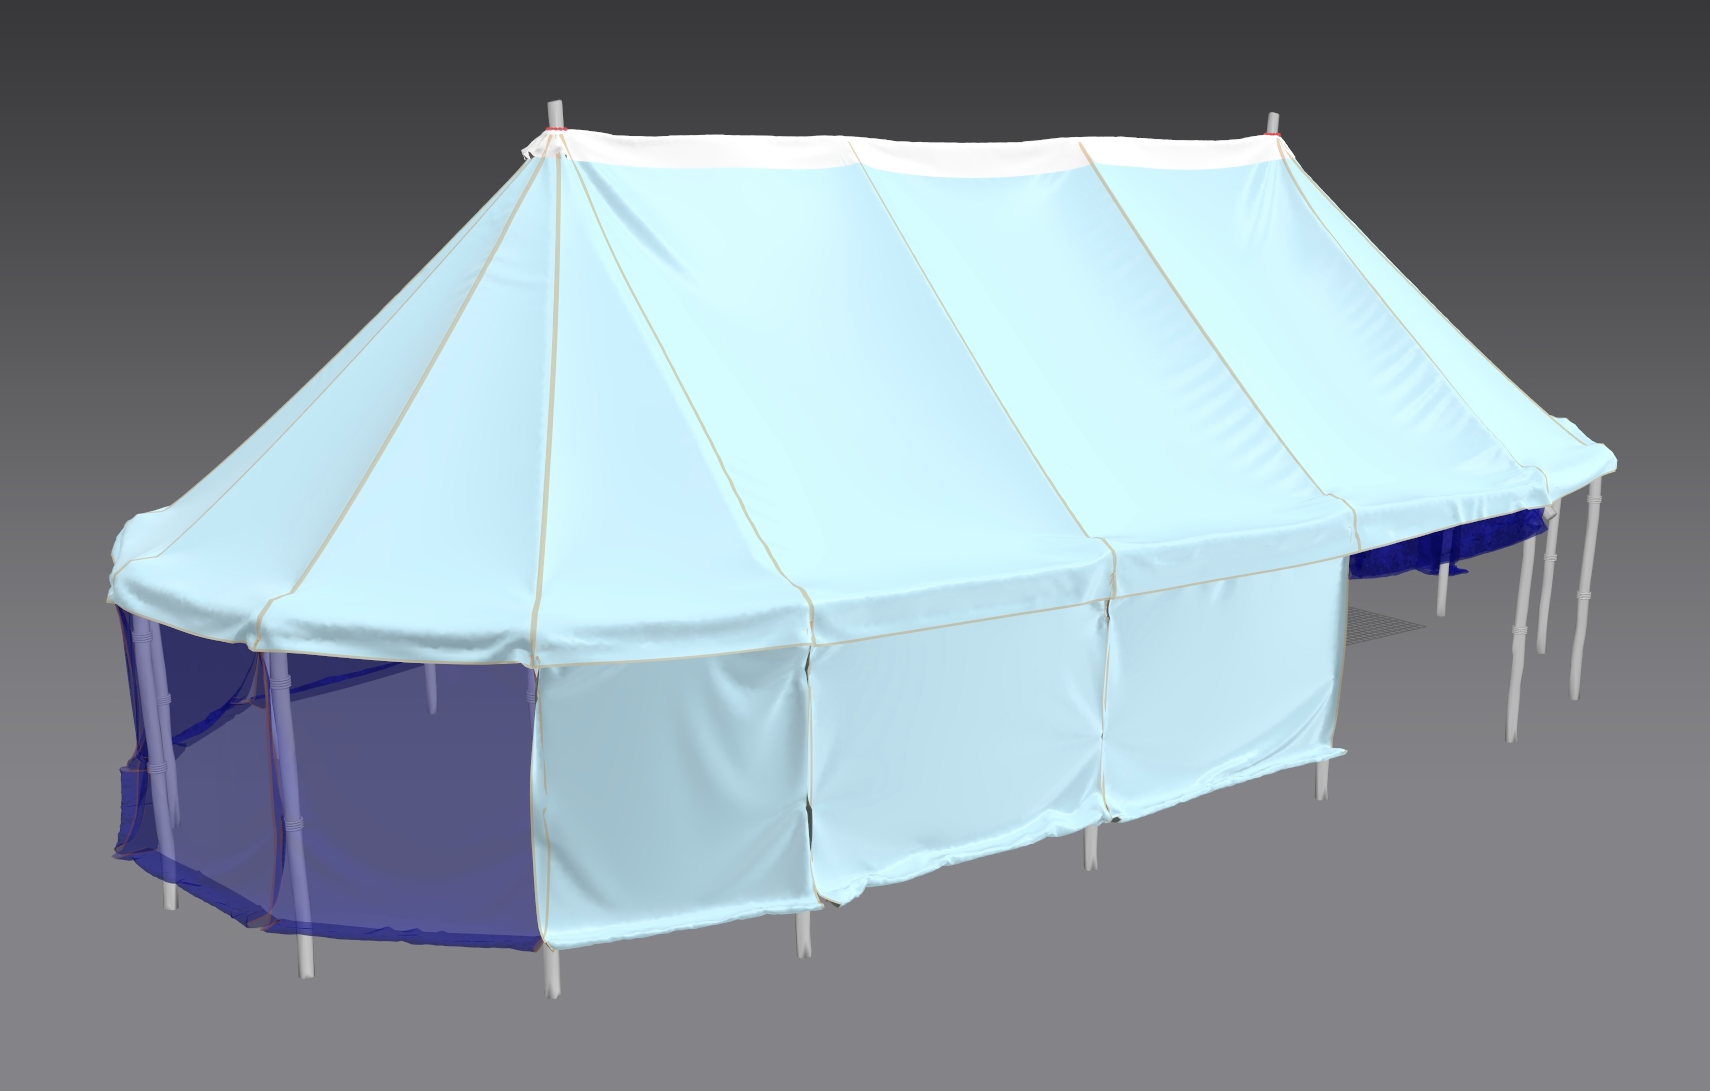
Other than that, the tacking tool is great, as you would want to have some kind of avatar to pin your cloth to (in the case of the circus fences & command tents, I’ve had very basic wooden poles as my tack-target). It can also help to tack cloth to other (frozen) cloth, so it mimics that underlying shape. This is incredibly helpful for creating modular pieces.
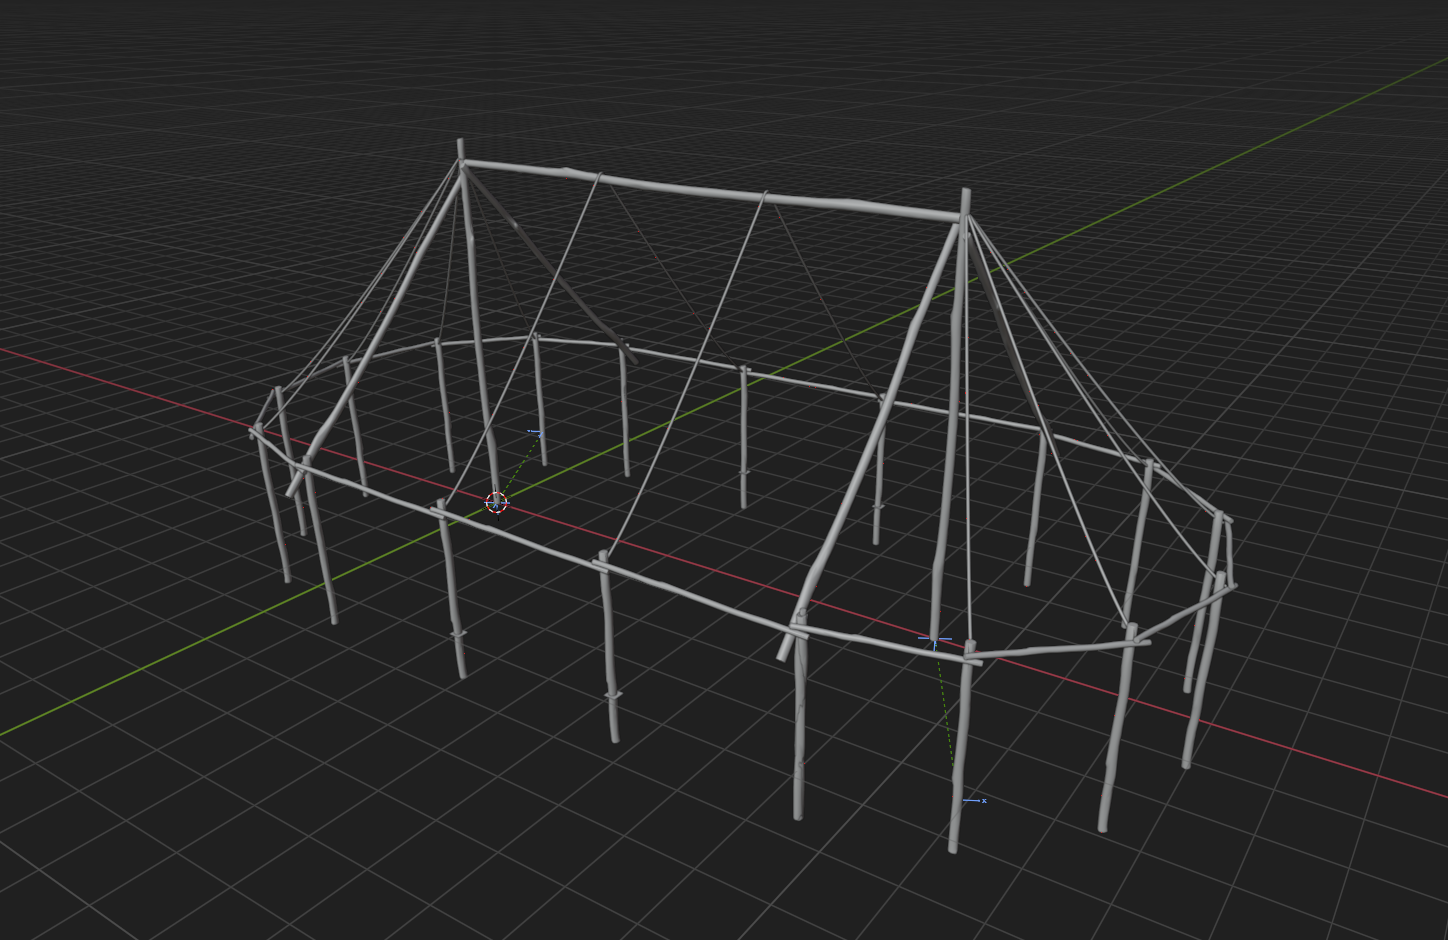
“Using some kind of avatar is essential to producing believable cloth.”
For the command tent I’ve set out to simulate a strip of cloth (yellow parts in the picture above), with slight sagginess which would be used at the start of a wall of cloth and at the end. The middle piece of cloth is what would be art directed on. This then allows you to create interesting variations of cloth whilst maintaining the exact geometry you need for the overlapping areas in modular assets.
The need for exactly matching geometry is further exacerbated at grazing angles where players can see through the sides. Whilst this wasn’t entirely possible on the circus fences, we made sure that this was covered on the command tent, as the circus area was more of a compound whereas the command tent was a small hut in terms of play space.
Another tip I’d like to share is to learn your hotkeys; makes working infinitely easier, faster and less cumbersome. With modular pieces you usually have several variants in the same scene for ease of iteration, and to get a good view of the entire picture. However, simulation times can become quite slow when you have a bunch of cloth pieces in one scene. This is where hotkeys come in handy - activate, deactivate, freeze, hide, etc. are all wonderful tools for navigating your scene comfortably and efficiently.
(📒 hotkey guide/shortcut guide)
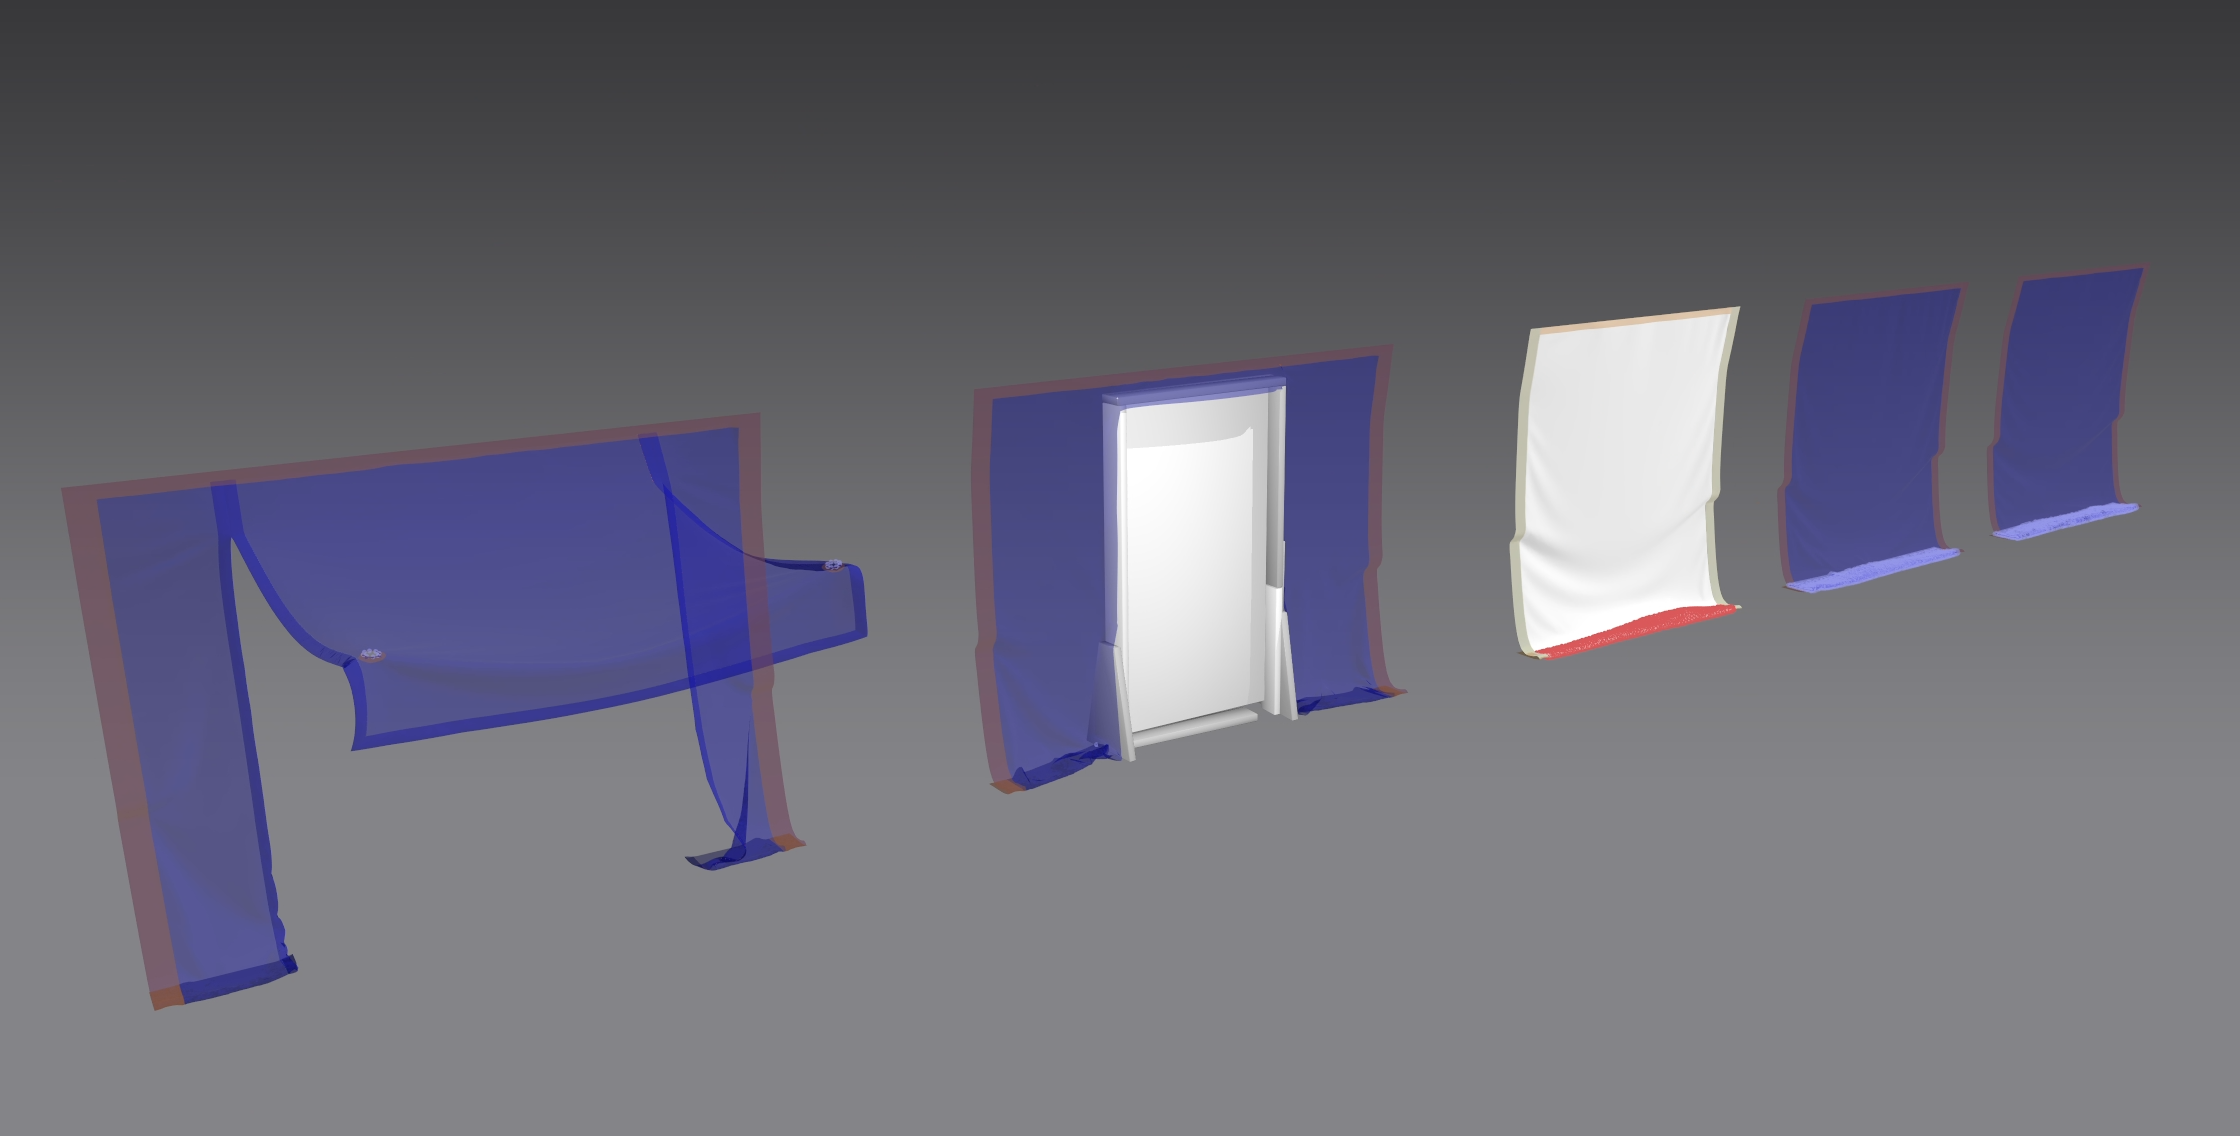 I’d also highly recommend to watch a few guides on making clothes with Marvelous Designer, as some theory is directly transferable to non-clothes tasks. I’ve spent a few hours watching professionals in the clothes-visualisation industry creating clothes from scratch.
For example, if you’re looking to create folds in a very specific way, you might want to give darts a try. Darts are cutting out a piece of cloth and stitching it back together. Essentially this reduces the length of cloth in an area drastically, which will create very specific folds. Whilst this isn’t the most realistic approach, it can be used as a tool to give you the visual result you’re after.
[Asset Breakdown] could you pick your most iconic fabric asset from the game and give us a quick breakdown of its production process?
Absolutely! For the command tent we’ve received the initial blockouts from our Environment Art Lead, Rishab Nanda, who made sure they fit their intended use cases. Since our team has done a lot of cloth tasks prior to the command tent, and to support the environment art team we were trusted with producing this modular kit.
I’ve started out with isolating the pieces I’d use for the avatar (the skeleton/scaffolding of the tent) and importing those into Marvelous Designer. These would stay in my file throughout the project.
First off, I made very crude shapes using the 2D view, placing them where I needed on the avatar in the 3D view, tacking it in place and then simulating. Just so we could get something into engine quickly. Essentially setting up the correct files so iteration would be rapid.
Then came exploring different shapes, sizes, etc. to get to a point where we would be happy visually. Art directing folds is a fun back and forth process, as you don’t have precise control over it. However, Marvelous Designer gives you as much control as possible.
After final shape/fold feedback was given, I split up the tent into the parts which would make up the modular kit and simulate a final version of them, staying as true to the agreed upon feedback as possible.
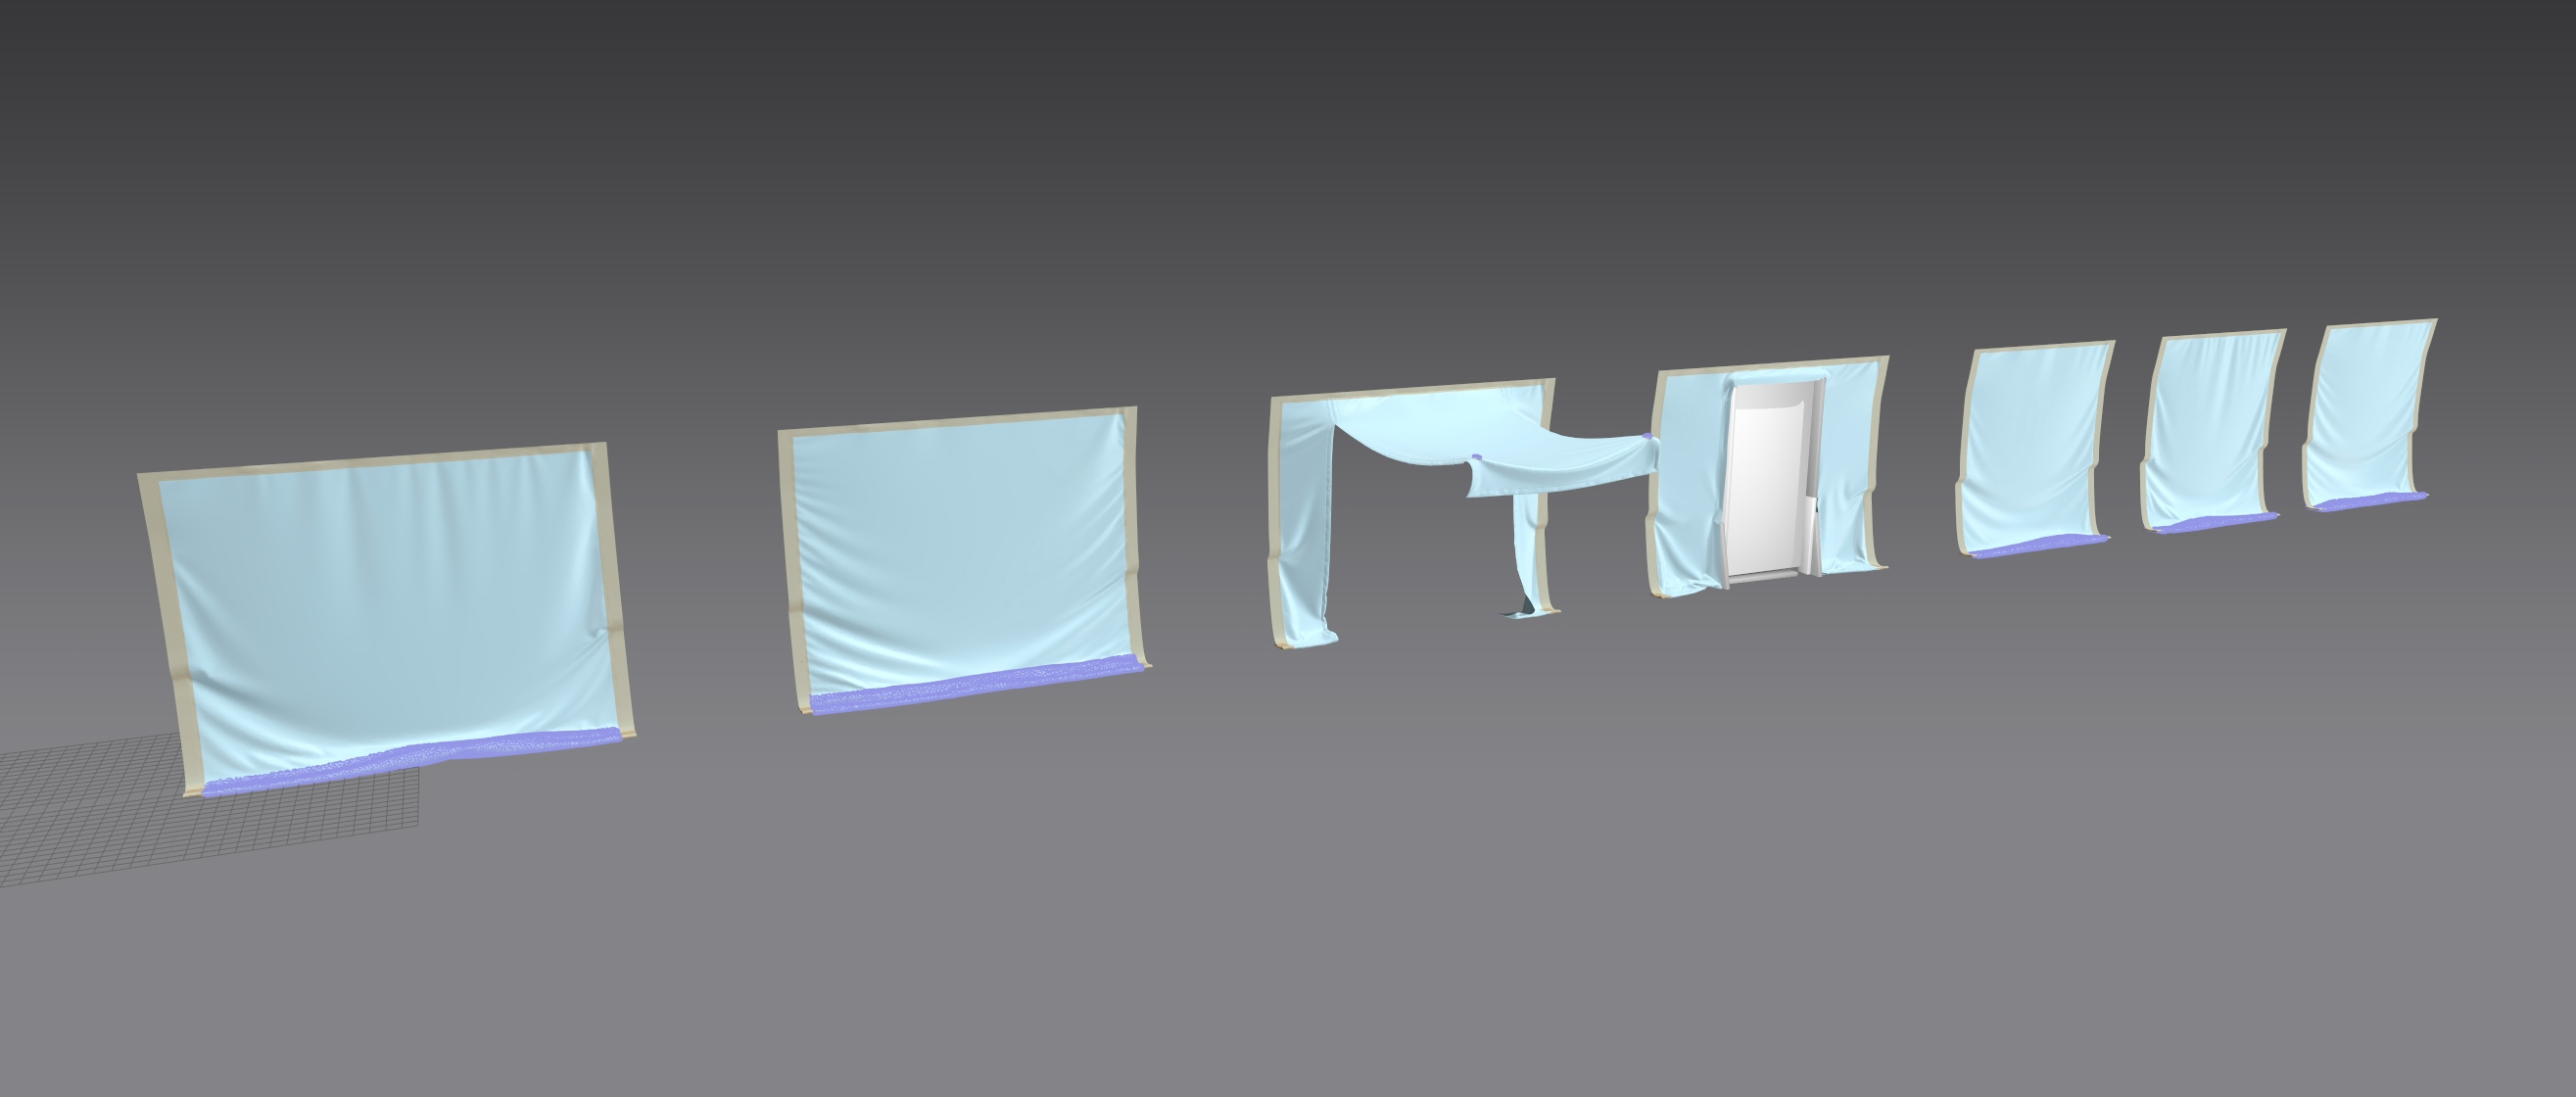 “This is the part where playing with the physical properties of your fabric can yield great final results, prior to this stage, it most often is simply wasted time.”
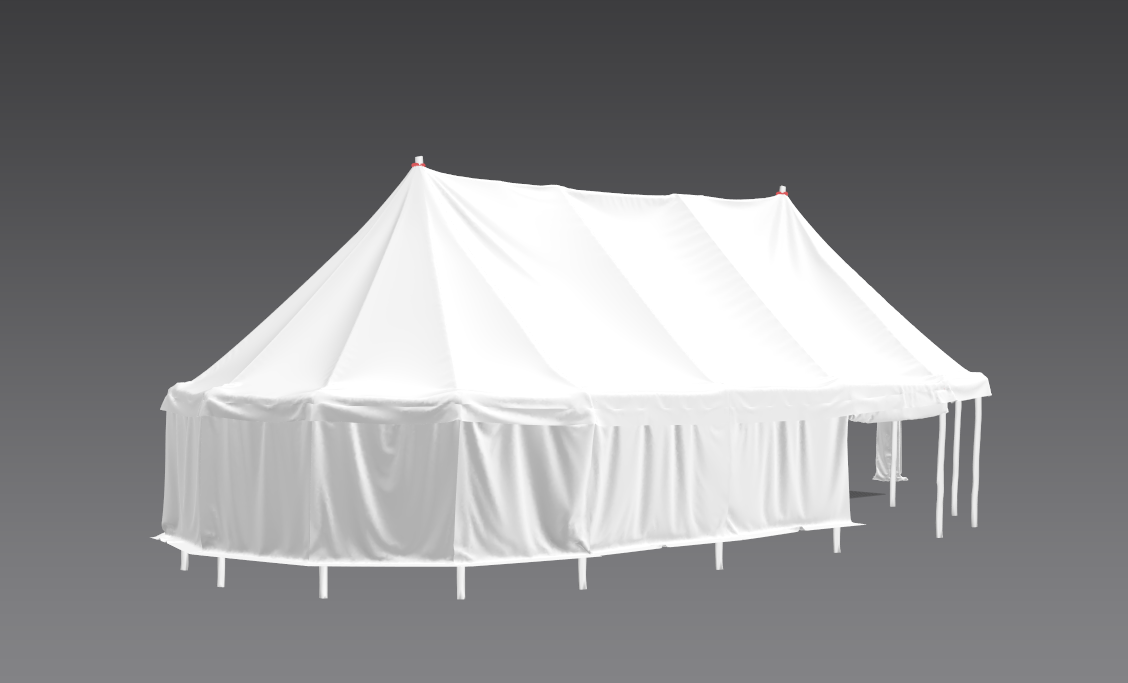
Simulating is only half the work, so after we’re all set and done, and happy with the simulated result we bring it over to blender, where the decimation modifier does a decent job at bringing the tents to reasonable level. We opted to bake the high poly simulated cloth onto low poly meshes with a low-resolution texture, due to the sheer size of the assets. Furthermore, this allowed me to create unique diffuse textures for each piece.
In engine we added a tiling detail normal map on top, which would give us the fine woven detail, as well as some micro folds to better sell the asset’s look, of a worn down, roughed up tent, fitting into the Hunt: Showdown 1896 setting.
An alternative to this would be to use a more high-poly mesh and tiling materials & masking, i.e. in Unreal Engine. Since we’re using the CryEngine though, this was the way we handled this asset.
Lastly, we’d have a final check in various time of days, and areas in the level, seeing whether it all fit nicely, or whether some things needed adjustment. Due to the environment art’s blockouts, we didn’t have to do much in the end, it was very much plug & play.
What is your favorite feature or tool to use in Marvelous Designer?
The artist friendly way to simulate things, I can pinch the cloth endlessly without the animation loop restarting as it would do in other programs. I can tweak to my heart’s content until I feel it’s visually where I want it to be. Other than that, in no certain order pinning & tacking, as well as the elastic feature in the selected line tab. This makes art directing folds even easier.
For other users considering Marvelous Designer, do you have any advice or experience to share?
Make mistakes, and make lots of them. No one’s born a master at their craft, in the end you’ll just gain experience by not being afraid to make mistakes. The amount of times I’ve fumbled up a perfectly simulated piece of cloth because I didn’t know of the freeze feature, or the deactivate feature is beyond count. Sure, you can undo, and most often it’ll get you your result back, but learning about other tools that aid in your workflow means you’ll be a more well-rounded artist down the line, you’ll have more tools at your disposal to make more complex tasks, more comfortably.
I’d like to end this interview with a small piece of advice which rings true to about anything you do in life. Including simulating cloth in Marvelous Designer. 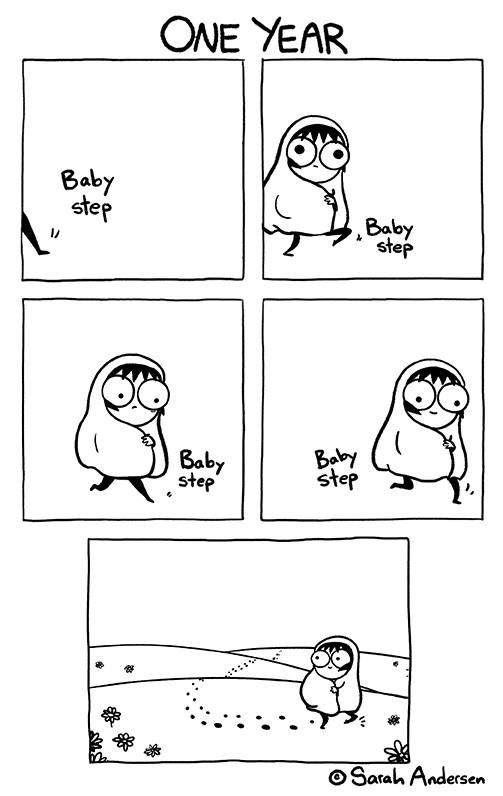
이 작업은 Game, Environment 등의 기술로 제작되었습니다.
Marvelous Designer로 이와 같은 3D 의상·캐릭터 작업을 직접 만들어볼 수 있습니다.